Home › Forums › General Questions › Multiple UV Maps Assignment
Tagged: UV Map
- This topic has 24 replies, 3 voices, and was last updated 6 years, 4 months ago by
 Mikhail Luzyanin.
-
AuthorPosts
-
2018-12-02 at 1:11 am #9389
 calbrechtCustomer
Yuri/Mikhail,
I’m still not totally set, still need your guidance.
Please have a look at the attached project. Mikhail, thanks for the explanation. I have decided to simplify my demo using one UVmap and get the thing implemented then add the second that you have provided me with an example.The piece I’m struggling is to introduce BSDF Diffuse node in Blender in order to use the new ‘Material’ puzzle to be able to control the image color (not the material) applied via UVmap.
I try many things but all I was bale to do was to change the color of the material not the image (e.g. star).Any advise or example would be great!
Thank you,
Cris2018-12-02 at 8:24 am #9393 Mikhail LuzyaninStaff
The piece I’m struggling is to introduce BSDF Diffuse node in Blender in order to use the new ‘Material’ puzzle to be able to control the image color (not the material) applied via UVmap.
I try many things but all I was bale to do was to change the color of the material not the image (e.g. star).You need to create an RBG input node and connect it to a specific Color input you want to change, than use this RGB node to controll the color via Change Color Puzzle.
Co-founder and lead graphics specialist at Soft8Soft.
2018-12-02 at 2:43 pm #9394 calbrechtCustomer
I see, a RGB Node not a BSDF. Will give it a try. Tks
Cris2018-12-03 at 2:18 am #9403 calbrechtCustomer
Got it to work, but my images are not that great quality once I manipulate thr RGB via puzzle. Need to find out why. Well huge progress today.
Cris2018-12-03 at 6:18 am #9404 Mikhail LuzyaninStaff
Got it to work, but my images are not that great quality once I manipulate thr RGB via puzzle. Need to find out why. Well huge progress today.
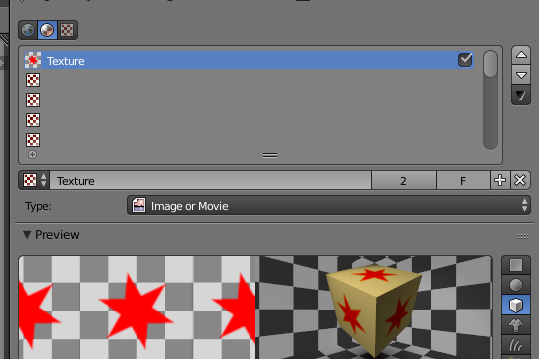
CrisAt first you need to reove this texture from image slot of standart material.

To get better quality it’s better to convert your image with red star to b/w texure and color it using mix mactor.
https://www.soft8soft.com/wp-content/uploads/2018/12/ice_screenshot_20181203-091634.pngOr do something like this.
Attachments:
You must be logged in to view attached files.Co-founder and lead graphics specialist at Soft8Soft.
2018-12-03 at 1:49 pm #9434 calbrechtCustomer
Got it! Thank’s for the tip!!
I will work on the “real” objects today.
Very exited to be able to use puzzels to manipulate the RGB!!!
Thanks,
Cris2018-12-03 at 2:41 pm #9441 Mikhail LuzyaninStaff
Very exited to be able to use puzzels to manipulate the RGB!!!
Glad you like it.
Co-founder and lead graphics specialist at Soft8Soft.
2018-12-03 at 6:55 pm #9451 calbrechtCustomer
Last thing to take care is to have my image which is a PNG (transparent background) to show the transparency once applied to my mesh.
Only the red star should have color… background should be whatever material the mesh has.2018-12-03 at 9:24 pm #9453 calbrechtCustomer
Never mind, I got it to work!
See attached image… perhaps there is a better more elegant way to do this, but thats ok.Thank you for all the support.
Cris2018-12-04 at 6:54 am #9469 Mikhail LuzyaninStaff
Never mind, I got it to work!
See attached image… perhaps there is a better more elegant way to do this, but thats ok.I see that you use Cicles and Blender Internal nodes in one material, this may cause a lot of bugs and not a clean pipeline to work with. Better to use Cycles nodes only or Internal, but remember that they already deprecated in Bleder 2.8, so if you want to keep updating the enigne you’ll better use Cycles nodes only. They fit your need as well according that I can see in your material. For Transparence just use Diffuse Shader and Transparent shader mixed with a Mix Shader node and connect your transperency mask (in alpha channel of your PNG) to mix factor of this node.
Co-founder and lead graphics specialist at Soft8Soft.
-
AuthorPosts
- You must be logged in to reply to this topic.
