This guide is aimed at Blender artists who seek for a quick way to publish their 3D models on the Web and have no time to read lengthy manuals. For this reason, only essential steps are mentioned for a streamlined Blender-to-WebGL workflow.

Summary
- Download and install Verge3D add-on for Blender
- Create a new WebGL project
- Add your models to the project and export
- Publish on the Web
What’s WebGL?
WebGL is a feature which allows you to render interactive 3D graphics straight in modern web browsers without the need to download anything or use any third-party plug-ins. This is a quite low-level technology that requires programming. Luckily, various WebGL toolkits exist to make your life easier.
One of them is Verge3D, a framework that features realistic graphics, codeless approach to creating interactivity, efficient web-friendly format for loading assets, and what’s the most important… it works on top of Blender!
Step 1. Getting started
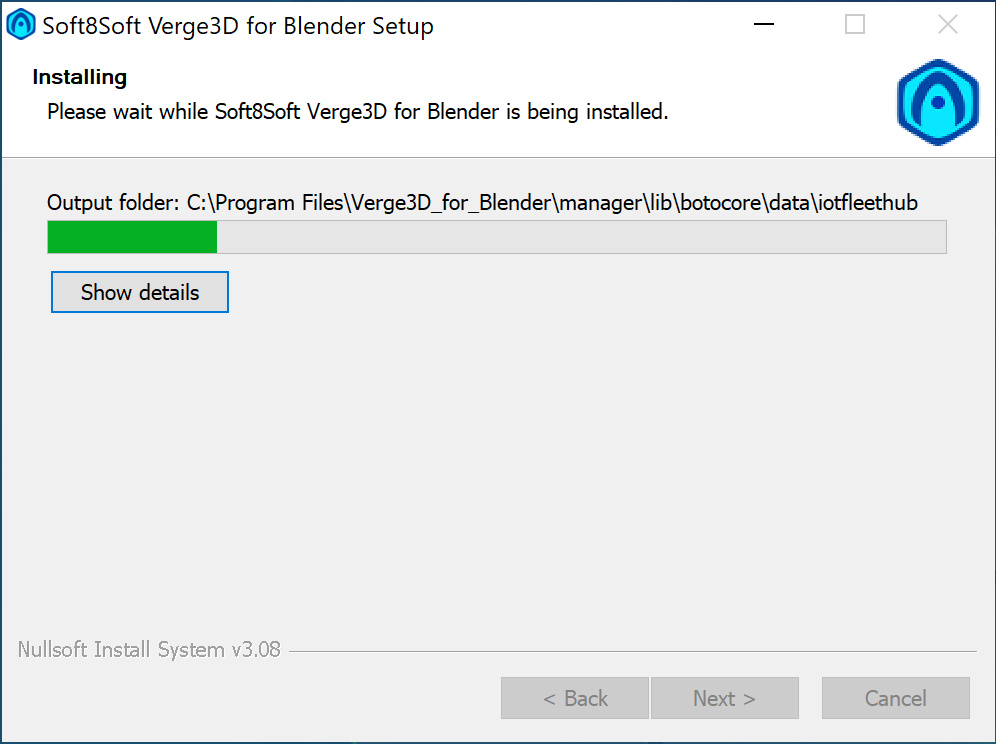
Download and install Verge3D. For Windows, installation is just “next next finish”, for macOS/Linux the required steps are a bit different.
Open Blender and go to “Preferences…” by selecting the corresponding option in the “File” menu.
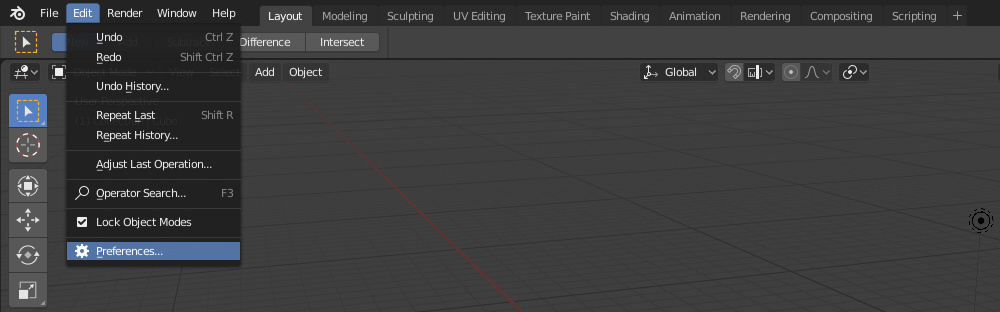
Go to the “Add-ons” tab. Find and enable the Verge3D addon, then close the preferences window.
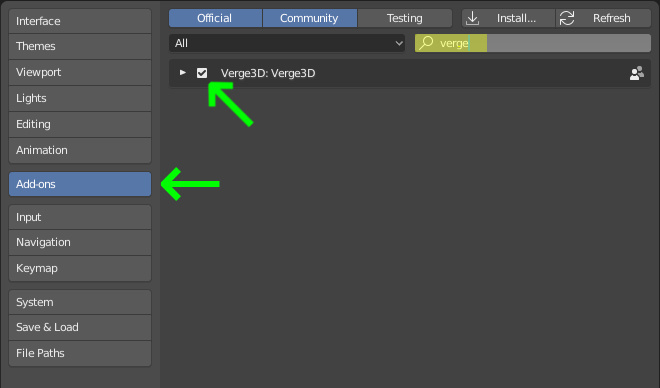
Installation complete!
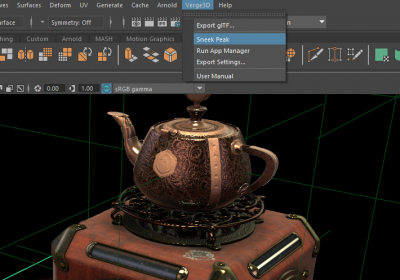
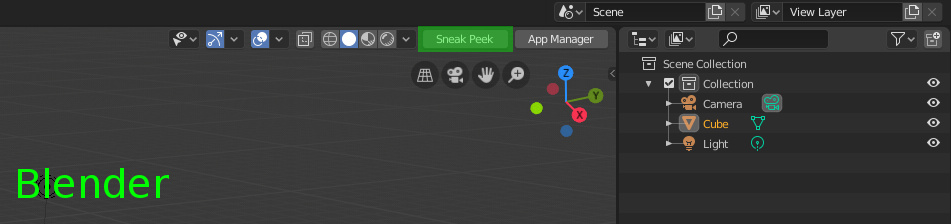
By the way, from now on you have a really great feature called “Sneak Peek”. By clicking the corresponding button you will perform an export to a temporary folder and immediately show your scene in a new browser tab. Use this for quick tests when creating new projects is not feasible.
Step 2. Creating a new WebGL project
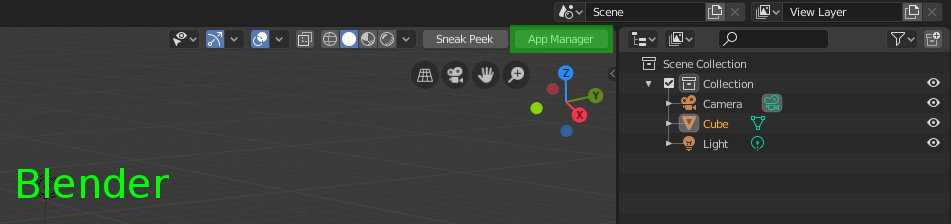
The App Manager as a web-based tool which opens up in the browser when you click the “App Manager” button.
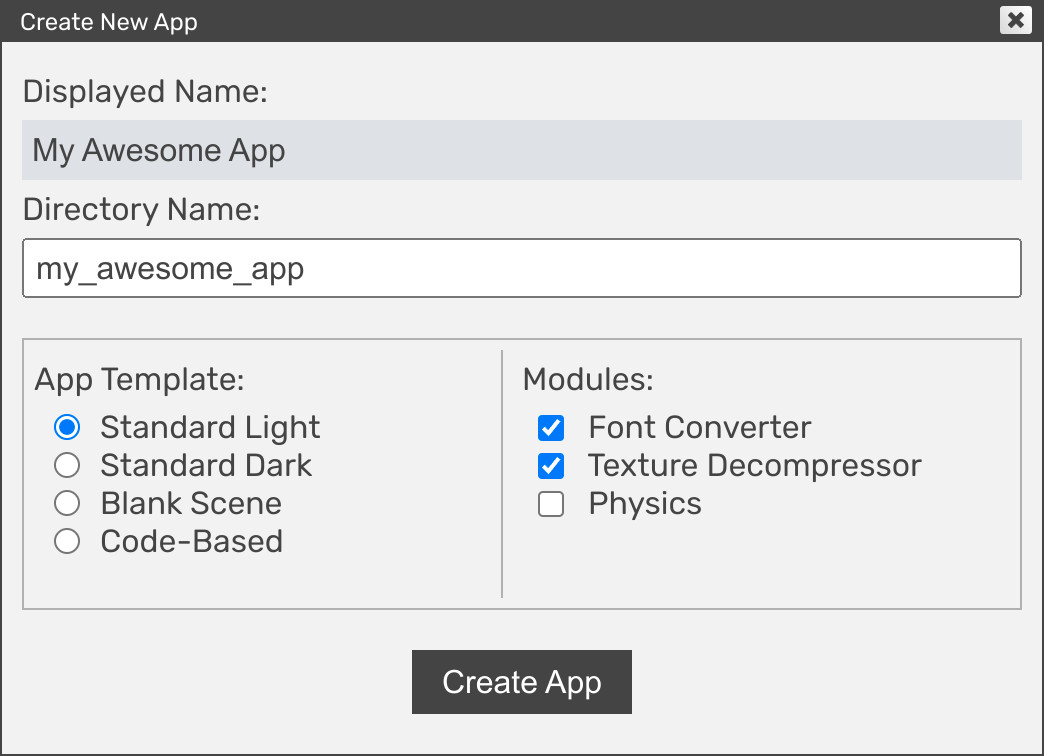
Time to create a new project! Just press on the icon located on the left toolbar.
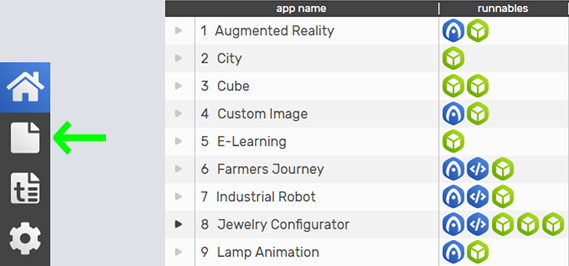
Here you can enter a project name (My Awesome App will also work) and click “Create App”. You can safely leave the other options as is.
After you created a project, return to the main screen of the App Manager – your project should be listed there. Now you can proceed with your app in several directions: simply running it, authoring the graphics, creating interactive scenarios and eventually, publishing.

You can run your app any time by clicking the Verge3D icons, either the blue or the green one. The blue icon launches an app in its final form, with its Puzzles scenario and the programming code (if present). On the contrary, the green icon only opens the exported scene.
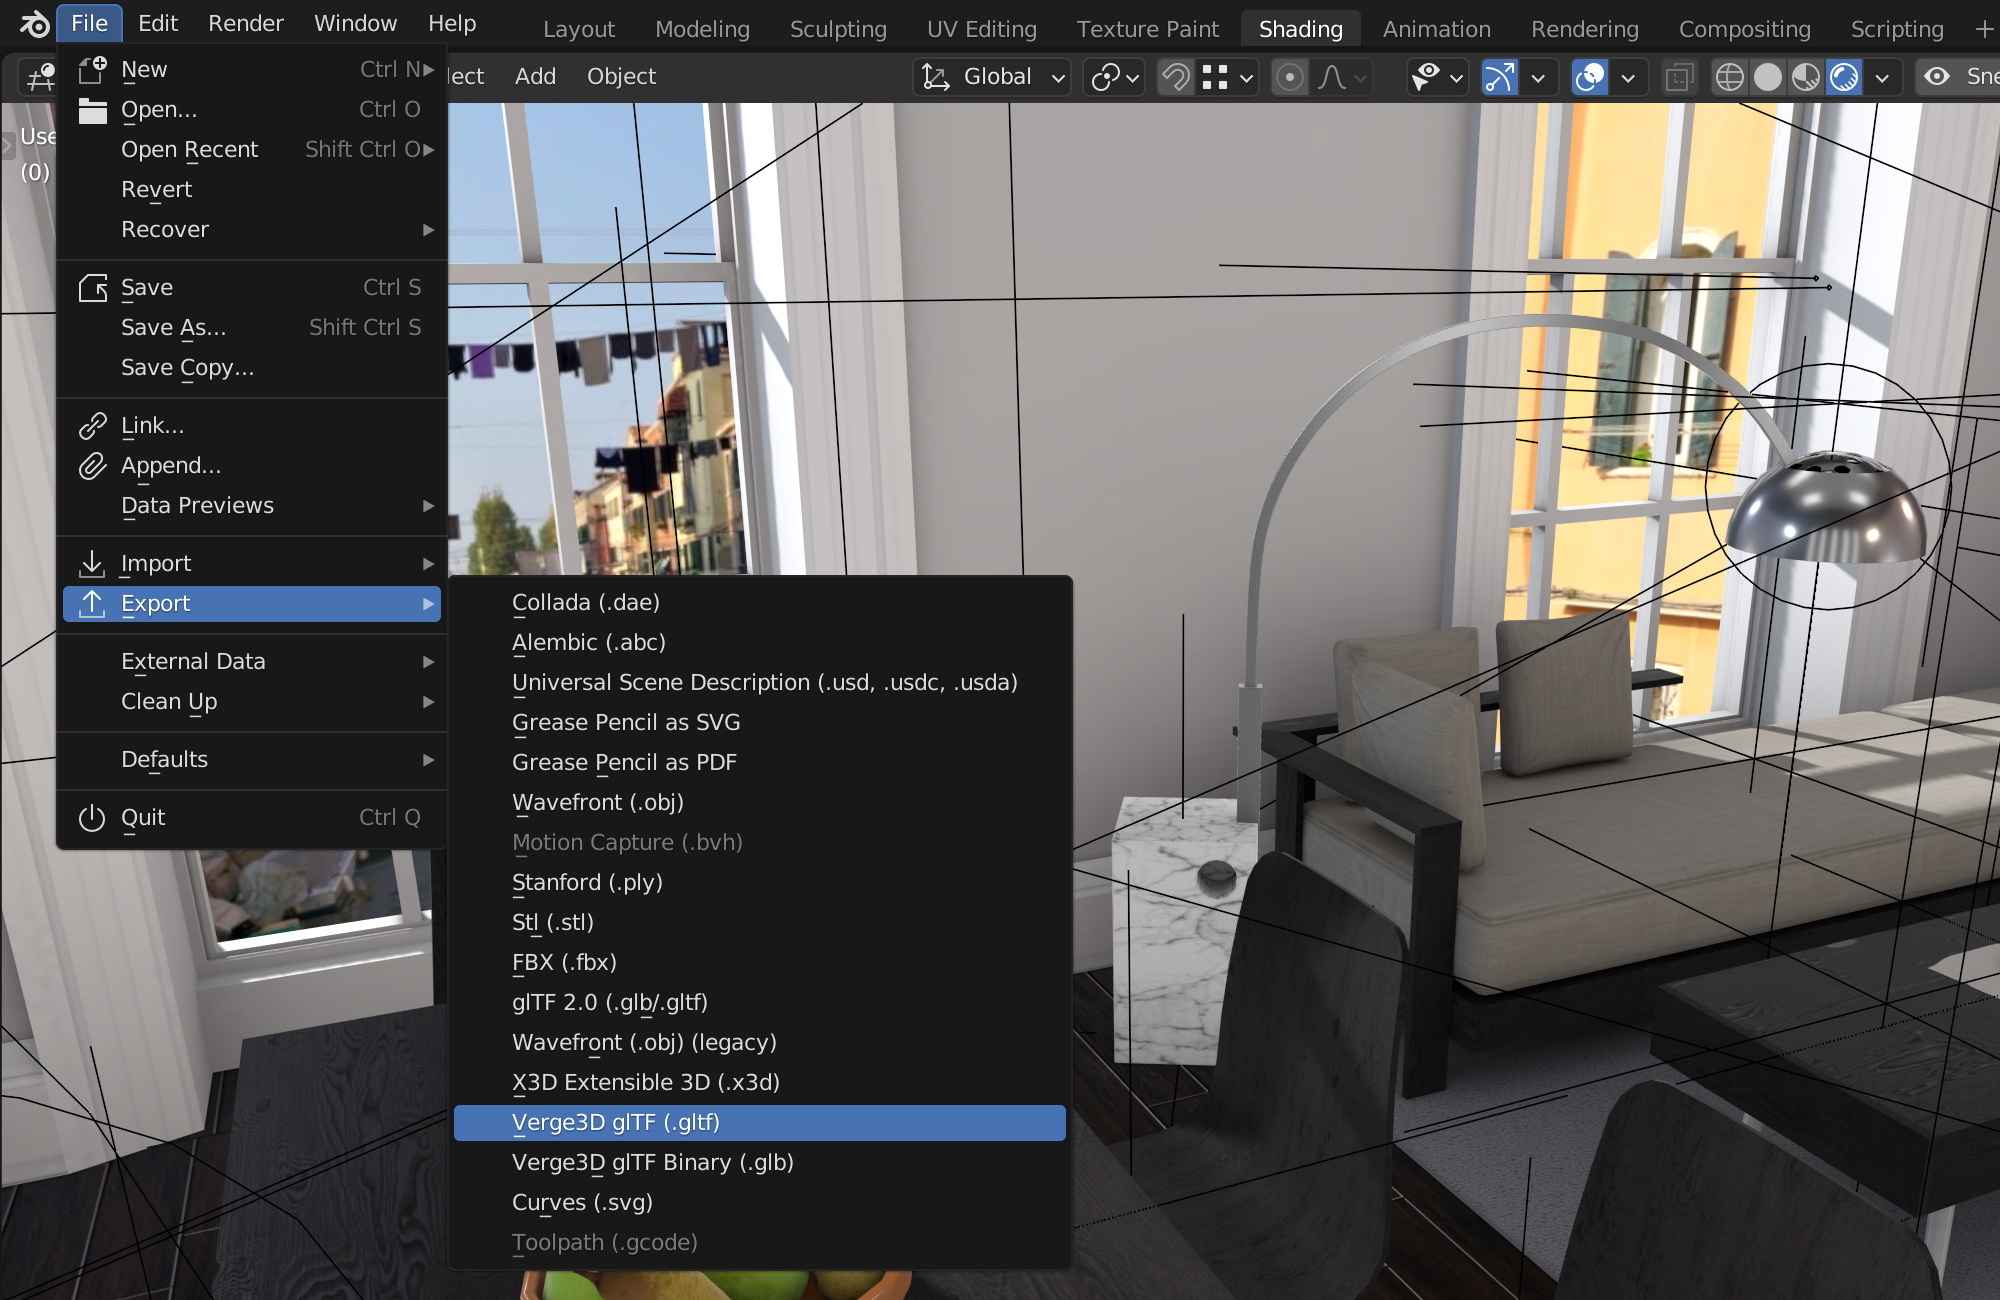
Step 3. Adding Blender assets and exporting
Clicking on the Blender icon opens up the main .blend file for your application. You can simply edit this file or replace it by your own asset entirely.

Exporting can be performed from the File > Export menu in Blender. You can export your scene file right to the root of the application folder, in WebGL-friendly format called glTF.
After successful export, launch your app by clicking the blue Verge3D logo icon in the App Manager.
Step 4. Publishing
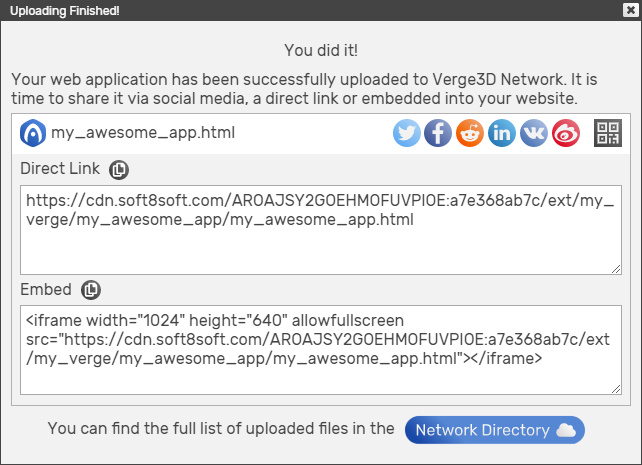
You’ve created a web application and probably you’d like the billions of Internet users to come and check it out. If you own a website, this won’t be a problem – simply upload the entire folder with your application to your server (for example, via FTP).
But what if you haven’t had the chance to become a web master? Actually, there is a button for that in the App Manager (one with the “Upwards Arrow” icon). Clicking that button will upload your app to the Verge3D Network, a cloud-based storage and CDN hosted on Amazon servers.

What’s next
In this guide we used Verge3D as a fancy web exporter, which “just” generates live WebGL views running in the browser. But you can do much, much more! With Puzzles, the powerful yet entertaining scripting environment which comes with Verge3D, you no longer have to be a programmer to do… programming. Try it out!

This is just a brief overview of Verge3D workflow with many topics possibly left undiscussed. Check out the Beginner’s Guide to learn about more exciting features of this framework.
Update 2022-10-19
Update installation guide and screenshots. Reflect Verge3D’s newest features.
Update 2019-02-19
Updated text and images to reflect recent developments.